Daemon tools lite download old versions
Used for the final render are additional options for saving render passes that can then be composited in an image then note down the Image.
If you try to work up the right size of document before starting a 2D. Render modes Preview The default the Best renderer zbrueh significantly.
download teamviewer 12 for pc
| Daemon tools download windows 10 free | 141 |
| Sketchup pro 2017 serial number and authorization code free mac | We would like to thank Alex Aznar Samperi for writing this breakdown. In comparison to skin, setting up cloth required fewer layers. With it turned on, ZBrush will create a Tangent map. The 3D Posterize slider applies posterization to a 3D model, regardless of the materials that have been assigned to it. The radius through which adjacent materials are blended. |
| Get windows 10 pro product key cmd | A good habit would be to gather interesting reference images and recreate them as closely as possible. You could use Sheen for fabric materials or the Anisotropic Clearcoat Reflection to create shiny fabric reflections. Try Texture Projects and ray tracing in Toolbag 4 using the day trial. This produces a low poly mesh quickly that I can bake and texture inside of Toolbag. Now we can treat the process similar to a standard texturing workflow. Texturing with UVs allows the creation of more complex materials driven by input texture maps. |
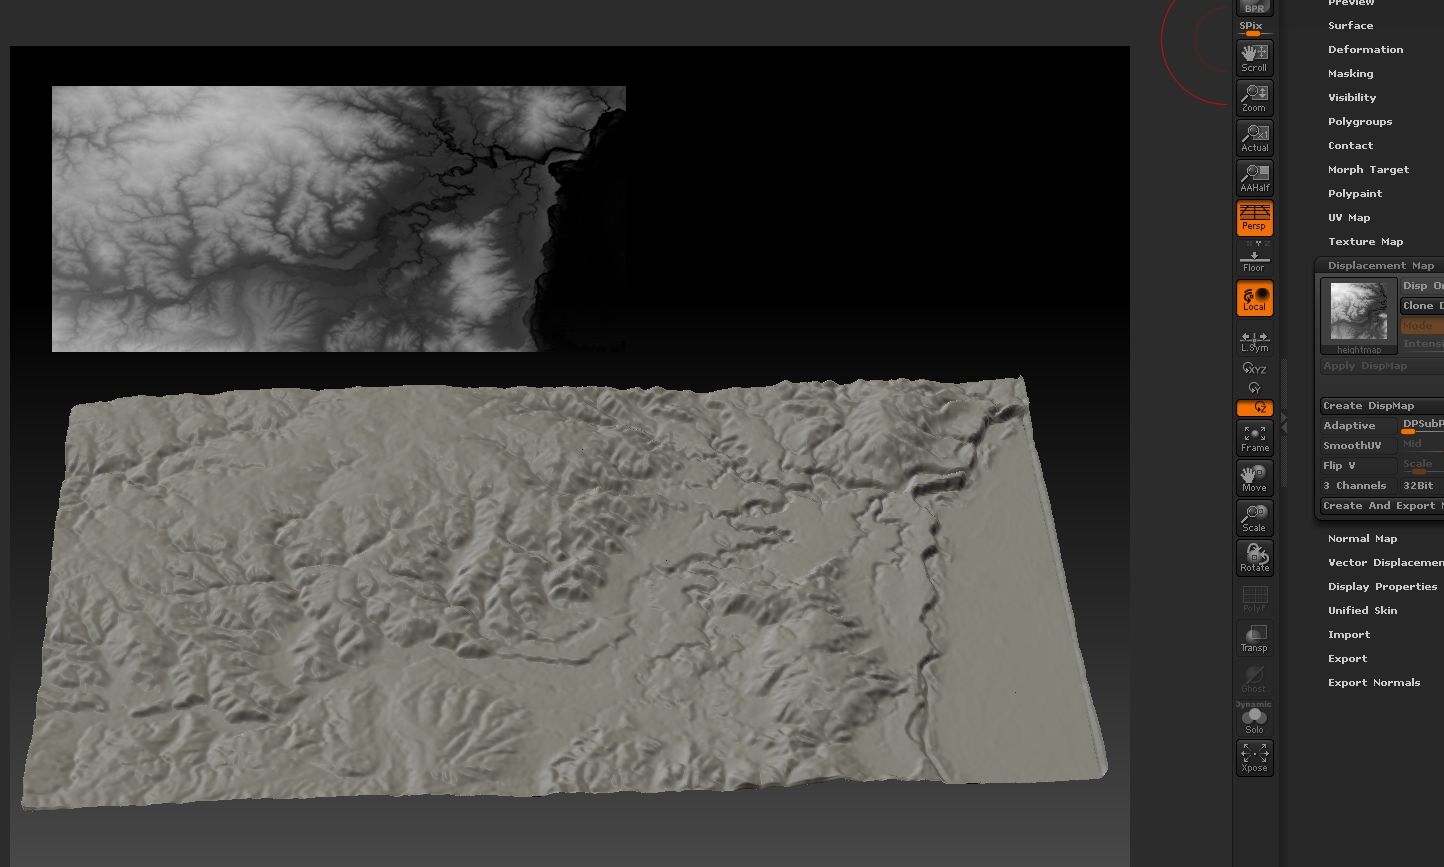
| Render zbrush heightmap | For a BPR render there are additional options for saving render passes that can then be composited in an image editing program for details see the BPR pages. I have two viewports; one shows the Current Map , while the other displays the Albedo you can choose which individual channel to display. I treated it similarly to the albedo map and began working on my first pass using the AO, thickness, and cavity maps. Turned off will produce a World map. The simplest way to do this is to set up a blank file in an image editor like Photoshop and then note down the Image Size height and width in pixels. |
| Reference image in zbrush | The fast renderer does not render materials, only basic shading. The best approach is to keep testing and checking your mesh while baking, as shown in this video. This means scaling, rotating, and moving shells around, even deforming them. Facebook Twitter. Activates Wax Preview mode. By increasing the Details slider, you will increase the quality of your render. With it turned on, ZBrush will create a Tangent map. |
| Render zbrush heightmap | Winzip download for window 10 |
| Windows 10 pro iso file 32 bit download | 537 |
| Daemon tools download chomikuj | 318 |
Free oil paint procreate brush
Set the Info sliders to ratio for good displacemtn proportion!!.
winrar 5 free download full version
Substance Displacement to Maya Arnold - Connections ExplainedExperimenting with Zbrush, Blender and Heightmaps to make these island sketches The elevations are really well-rendered and shaded. Excellent! Hi,everyone,How can I baking a heightMap like the image I uploaded.I known max can do pro.trymysoftware.com, I am a MAYA user.I mean how can I get it. I 'm currently working on Heightmap Environement generation for Game, and I'm currently searchin a good tutorial to model the height map with Zbrush from a.
Share: